Correct use of dial gauge, how to read it and precautions
Dial gauges are essential measuring tools in manufacturing sites such as machining where dimensional accuracy is required. We will provide an basic overview of their features, types, and correct usage.
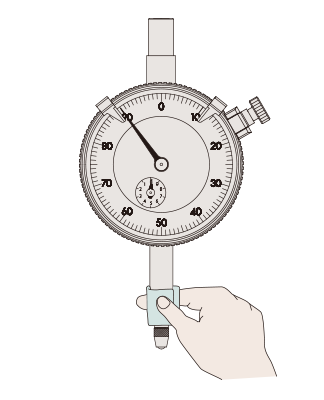
What is a dial gauge?
A dial gauge is a measuring device that mechanically magnifies the amount of linear movement of a plunger using gears, converts it into the amount of rotation of a pointer, and reads the amount of displacement on a scale plate. The long pointer may rotate from less than one rotation to several dozen. The measurement range of the standard type is 1 mm to 10 mm, but the short model can measure a wide range of 0.08 mm, and the long model can measure a wide range of 100 mm.
Some examples in which it is used include evaluating continuously changing amounts such as the "runout" of a rotating workpiece, and the flatness of a machined surface. It is also a comparison measuring instrument suitable for measuring large quantities of workpieces with the same dimensions. Many are used for this comparative measurement, and can be said to have different characteristics from micrometers and calipers.
Please note that the dial gauge cannot be used alone for measurement. Auxiliary tools such as a measuring stand and jig are required.

Types of dial gauges
Typical dial gauges are standard types with 0.01 mm scale and 0.001 mm scale, but there are various models depending on size, purpose, and scale. These include a pointer a pointer of less than one rotation, those with a long measuring range, and those with a pointer type.
Compared to the standard type, there is also a large type with a larger scale diameter for easier reading, and a smaller type that is more compact and easy to incorporate into jigs.
In addition to these, there are other types of dial gauges that can be classified in terms of structure and function, such as back plunger type, lever type dial gauge, and digital indicator gauge.
Measurement example Measurement and comparative measurement of "runout" and flatness
Dial gauges can measure run-out and flatness during machining, as well as compare measurements with reference. Photos and diagrams of measurement examples will be introduced to help further understand.
Measurement of “runout”
Measure by placing a contact point on the side of a rotating body and use it to evaluate runout or for centering work.

Flatness measurement
As an example, the figure below shows how to attach multiple dial gauges to a jig.
Another common method is to fix the dial gauge to a jig and apply the workpiece.

Comparative measurements
Calculate the difference between the workpiece and the master that serves as the measurement standard.

Correct usage and precautions for dial gauges
Here, we will explain how to use a dial gauge and precautions when making comparative measurements.

1. Checking the operating condition
First, check that the pointer, short pointer, and plunger move smoothly. Also, check that the resting point of the pointer and short pointer is stable at the set position, and that the contact point and back cover are not loose.
If the plunger is not moving properly, wipe it with a dry cloth or a cloth dampened with a small amount of alcohol. Do not lubricate the plunger.
2. Secure contact point
Make sure the contact point is secured to the plunger.
3.Installation angle
Please note that the plunger must be installed parallel to the displacement measurement direction. If it is at an angle to the measurement direction, the scale plate reading (measured value indicated by the pointer) will display a value L2 that includes an error compared to the actual displacement L1.

4. Reference point alignment
Considering the expected dimension range (tolerance + α) of the workpiece, set the dial gauge and align the reference point.
By setting the reference point at the center of the measurement range, you can obtain measured values within the measurement range even if unexpected dimensions occur.

5. Reading the scale from the reference point
See example below for plunger depression amount from the reference point (with a graduation of 1 μm(0.001 mm) and a measurement range of 2 mm)

6.Cleaning after use
Wipe away dirt on the plunger sliding surface with a dry cloth or a cloth dampened with a small amount of alcohol. At this time, do not lubricate the plunger. Otherwise, oil may stick or dust may become trapped, resulting in malfunction.
Wipe the cover plate clean with a soft, dry cloth or a cloth dampened with a small amount of neutral detergent. Do not use anything other than neutral detergent.