Correct use of micrometer, how to read it and precautions
Micrometers are indispensable precision measuring tools in the manufacturing field. This section provides basic explanations of the measurement methods and features of micrometers, as well as correct usage and precautions.
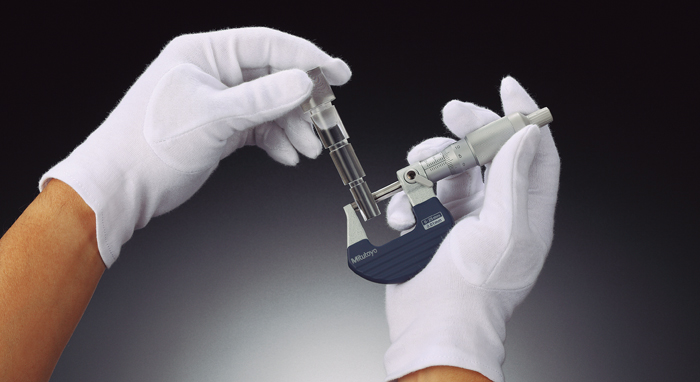
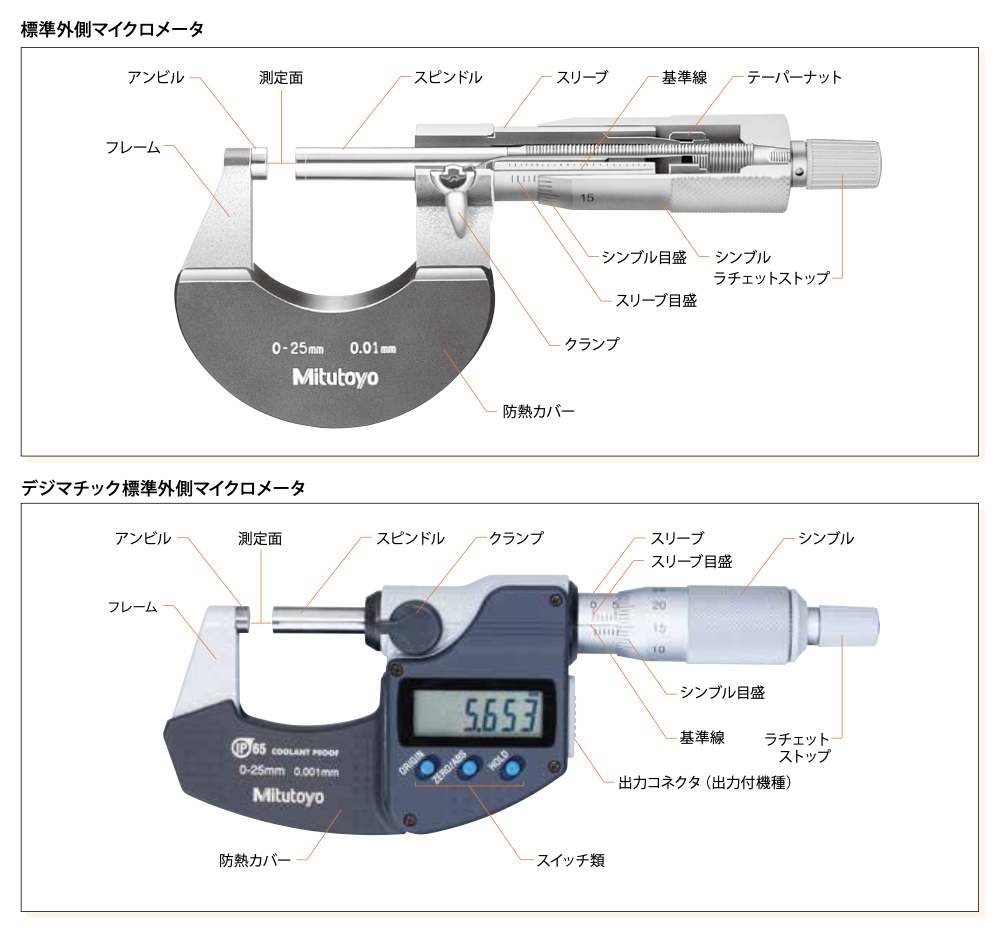
What are precision measuring tools and micrometers?
A micrometer is a tool to precisely measure the outer diameter and length (thickness) of an object to be measured by clamping it. The measurement method uses a precision screw with a pitch of 0.5 mm, and the rotation of the screw is calculated as the axial displacement of the screw. Currently, there are models that use a 2.0 mm pitch precision screw, enabling faster measurement by using a screw with a larger pitch.
Since ancient times, measurement has been necessary in various aspects of human society, including pyramids. In manufacturing, "what cannot be measured correctly cannot be processed correctly," and "measurement" is essential to evaluate the quality of products. A micrometer is one of the indispensable tools for precision measurement.
For example, more than 3,000 micrometers are actually used at production sites of aircraft-related companies, playing an important role in air safety.
*The above is a description of the outer micrometers.
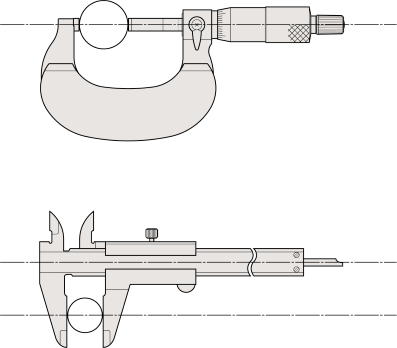
High-precision measurement is realized by "Abbe's principle" (law of precision measurement).
Abbe's principle states that "the object to be measured and the standard scale must be aligned in the direction of measurement". Micrometers are tools based on this principle and are capable of higher precision measurements than calipers and other measuring instruments.
A micrometer is a simple-looking tool, but the standard model can read down to 1 μm(micrometer). 1 μm is 1/1000 of 1 mm, which is about 90 μm for copy paper, 70 to 80 μmfor a hair, and 10 μm for food film. This unit is very fine, showcasing how precise a tool such as the micrometer is.

Typical micrometer types
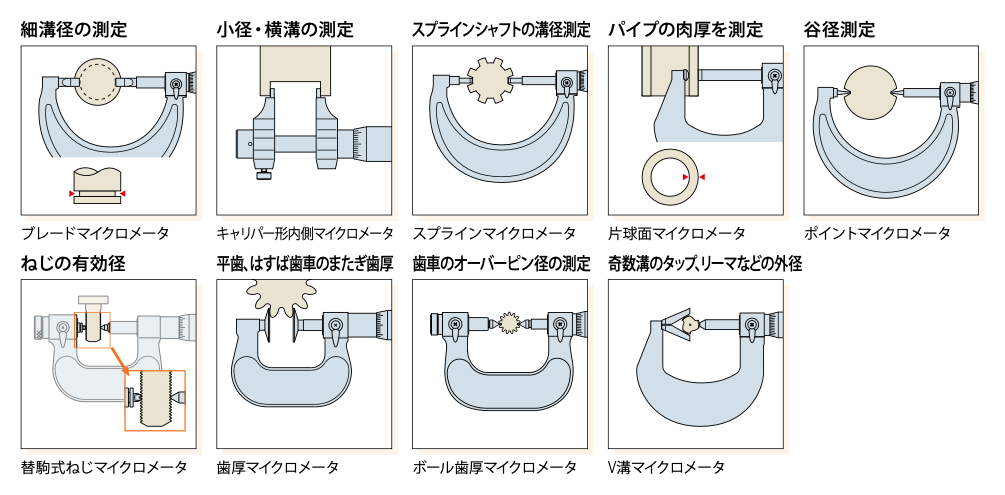
Generally speaking, micrometers are cylindrical in shape, with the measuring surfaces facing each other, but there are various types of micrometers for different purposes.
Examples of typical types include the "caliper type inside micrometer" for measuring small diameter and horizontal grooves, the "replacement piece type screw micrometer" for measuring the effectiveness of screws, and the "tooth thickness micrometer" for measuring the straddle tooth thickness of spur and helical gears.
As shown in the figure below, there are various other types available for different purposes of use, such as measuring the diameter of narrow grooves, pipe wall thickness, and gear overpindiameter.
*We can also accommodate custom-made products according to the purpose of use.
Proper use and precautions for micrometers
Here we explain the main usage and precautions, using a standard outside micrometer as an example. Micrometers can measure from 0 mm to 2000 mm. Confirm the measuring range and select a type suitable for the shape of the object to be measured and the purpose of use.
1. Allow the micrometer and the object to be measured to warm up to room temperature before use.
If it is not adjusted to room temperature, errors will occur due to thermal expansion.
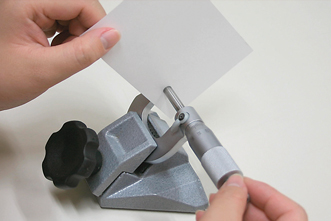
2. Wipe both the anvil and spindle measuring surfaces thoroughly with white paper before use.
As part of daily maintenance, thoroughly wipe away dust and chips from the outer circumference of the spindle and the measurement surface. Also, thoroughly wipe away dirt and fingerprints from each part with a dry cloth.
3. Check the base point before use.
1) Turn the ratchet stop (constant pressure device) slowly to align the measuring surfaces of the anvil and spindle.
When the ratchet stop is turned, it spins with a crackling sound to apply the appropriate measuring force to the surface to be measured.
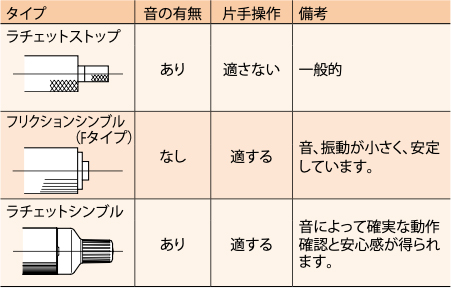
Ratchet stop type is generally used as a device to keep the measuring force constant, but friction thimble type and ratchet thimble type are also available for the same purpose.
2) Check that the zero scale line on the thimble matches the reference line on the sleeve.
When mounting the micrometer on a micrometer stand, clamp it across the center of the micrometer frame and do not excessively tighten. Then, adjust the angle of the stand so that the upper and lower scales are evenly visible centered on the zero scale line of the thimble, and fix it in place.


4. After preparation and confirmation before use, take measurements.
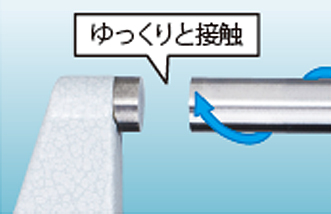
When measuring, slowly bring both measuring surfaces into light contact with the workpiece to be measured in the same posture and under the same conditions as when the base point was checked, and turn the ratchet stop slowly 3 to 5 times to avoid excessive measuring force by the spindle. To avoid deformation of the workpiece, turn the ratchet stop slowly during contact.
5. Read the scale.
The thimble scale is read where the reference line on the sleeve and the thimble scale line are aligned. If there is a deviation, read the scale below the reference line. The sleeve scale reads the maximum visible value.
When reading the scale, be sure to read the scale from the front. As shown in the figure, changing the eye position from (A) to (B) to (C) will change the scale alignment position. To avoid errors due to eye position, read the scale from the position (B) perpendicular to the point where the sleeve reference line and thimble scale line meet.